If you’ve ever searched Shopify forums for “how to link separate products with color swatches,” you already know how frustrating this is. Dozens of threads, very few real answers. Everyone says to use variants, but what if you can’t use variants because each color is its own separate product?
The answer is a combined listings setup that takes your individual Shopify products and connects them with visual swatches on a single product page. No code, no Shopify Plus.
I’ll show you how to set this up from scratch.
Why Are Your Color Options Separate Products in the First Place?
Most merchants don’t choose to have separate products per color. It usually happens for one of these reasons:
You hit Shopify’s variant limit. Shopify caps variants at 100 per product. (They recently expanded this to 2,000 for some plans, but the 3-option limit still applies.) A t-shirt in 12 colors and 9 sizes creates 108 combinations, which already breaks the old cap. So stores split colors into separate products.
Your supplier or ERP sends them that way. If you import inventory from a wholesaler, POS system, or something like NetSuite or TradeGecko, each colorway typically arrives as its own SKU with its own product listing. Merging them by hand? Nobody has time for that.
You want separate URLs for SEO. Most guides skip over this, but having each color as its own product with a unique URL, title, and meta description can actually be better for search rankings. “Navy Blue Linen Blazer” ranks differently than “Linen Blazer – Navy.” When you collapse everything into variants, you lose those individual pages.
The problem isn’t having separate products. The problem is that your customers see five separate cards on the collection page and don’t realize they’re the same item in different colors.
The 3 Ways to Connect Separate Products with Swatches
There are roughly three approaches, ranging from manual and fragile to turnkey.
Method 1: Manual Metafield Linking (Free, but Painful)
Shopify lets you create product metafields that reference other products. In theory, you could:
- Create a metafield called “Related Color Variants”
- Link each product to its sibling products
- Build a custom Liquid section that reads this metafield and renders swatches
In practice, this works if you have 10 products. Once you’re past 200, maintaining these cross-references turns into a full-time job. You also need to write (or pay someone to write) Liquid code for the swatch rendering. And every theme update risks breaking it.
Method 2: Shopify’s Native Combined Listings App
Shopify released a Combined Listings app in 2024 that groups separate products into one listing.
The problem? It requires Shopify Plus, which starts at $2,300/month. For most small and mid-sized stores, paying that much just for swatch functionality isn’t realistic.
Method 3: Third-Party Combined Listings Apps (Recommended)
Apps like Rubik Combined Listings do the same thing without requiring Plus. The concept:
- You pick the “parent” product page where customers will land
- You select which separate products should show up as color (or style, or material) options
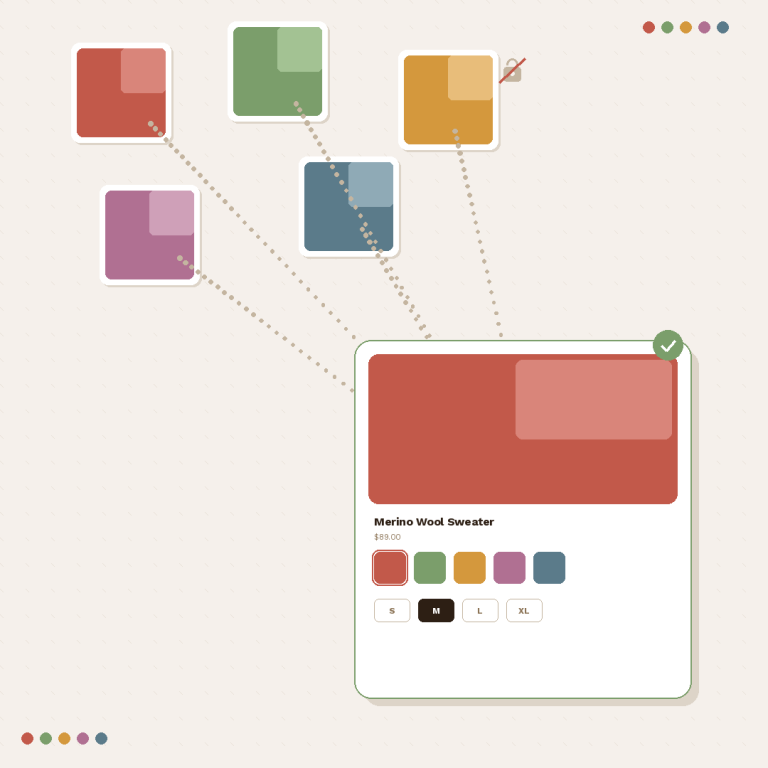
- The app renders visual swatches on the product page: image thumbnails, solid colors, two-tone color splits, buttons, or a dropdown
- When a customer clicks a swatch, they’re taken straight to that product’s page with its own images, price, and inventory
No Shopify Plus needed. No theme code to edit. Each product keeps its own URL for SEO.
Want to see how this looks on a real store? Browse the Combined Listings Demo Store to see separate products displayed as swatches on a live Shopify theme.
Step-by-Step: Setting Up Combined Listings with Swatches
I’m using Rubik Combined Listings for this walkthrough since it works on any Shopify plan. The general logic applies to any similar app.
Step 1: Install and Activate the App Embed
After installing Rubik Combined Listings from the Shopify App Store, the first thing you need to do is activate the app embed on your theme. The app embed is what loads the swatch component on your storefront. If it’s not enabled, nothing will show up.
On the app dashboard, you’ll see an App embed status section that tells you whether the embed is Active (green badge), Inactive, or needs action. Click Activate or Manage app embed to see all your installed themes in a table with their current status. You can enable or disable the embed for each theme individually, which is handy if you want to test on a draft theme before going live.
Step 2: Select Your Theme Type
This is the step most people skip, and it’s usually why swatches end up in the wrong place or don’t show up at all.
Every Shopify theme has a different DOM structure. Rubik uses a theme type setting to figure out exactly where to inject swatches on product pages, collection grids, quick views, and search results. The app supports a wide range of official and third-party themes, but it needs to know which one you’re running.
Open the app embed management section and select the correct theme type for your active theme. If you’re using Dawn, Refresh, or any popular paid theme, you’ll find it in the list. If swatches aren’t appearing where you expect, this is the first thing to check.
Step 3: Create a Product Group
A product group is the core structure that ties your separate products together. Go to the app dashboard and create a new group. You’ll set two fields:
- Internal name for your own reference (customers won’t see this)
- Option name that shows on the storefront, like “Color,” “Material,” “Size,” or anything you want
Then use Shopify’s product picker to select the products that belong together. For each product, you can set:
- Option value (the swatch label, like “Navy,” “Walnut,” or “XL”)
- Primary and secondary colors using the built-in color picker (it has an eyedropper tool that can sample colors directly from the product image)
- Custom swatch image if you want to show a specific texture, fabric swatch, or closeup that isn’t the product’s main photo
If you have a lot of products to set up, the Magic Fill feature saves a ton of time. It uses AI to analyze your product titles and images, then automatically fills in the option values and assigns matching colors. So instead of manually typing “Black,” “Blue,” “Forest Green” for 30 products, you click one button and it does it for you.
Step 4: Pick Your Swatch Type and Style
Rubik gives you four swatch display types. You can set different types for the product page and for product cards in collections.
| Swatch Type | Best For | What It Looks Like |
|---|---|---|
| Image | Colors, patterns, fabrics, materials | A card-style swatch showing the product image or custom texture, with optional name and price below |
| Button | Sizes, model names, text labels | A clickable text button, optionally with a small image inside |
| Dropdown | Lots of options, minimal space | A native select menu, great when you have 20+ options |
| Color | Simple solid colors or two-tone splits | A small swatch filled with one or two colors (vertical, horizontal, or diagonal split) |
For the image source, you can choose between: first product image, second product image, last product image, a custom uploaded image, one solid color, two-color split, or Auto (which tries custom image first, then colors, then falls back to the product image). Auto is the safest choice if some products have custom swatches and others don’t.
You don’t have to configure every visual setting from scratch. The app includes style presets with ready-made designs: square polaroid, circle swatches, rounded swatches, carousel layouts, pills with images, buttons with prices, and more. Pick a preset, then fine-tune from there if you want.
You can also choose between a Grid layout (rows and columns) and a Carousel layout (horizontal scroll with optional navigation arrows). Carousel works well when you have many options and want to keep the page compact.
Step 5: Enable Swatches on Collection Pages
This is the part that makes the biggest difference in how your store feels to browse.
When someone lands on your collection page, they shouldn’t see five cards for the same blazer in different colors. They should see one card with small color dots underneath, the same way Zara or H&M displays their products.
Rubik places swatches directly on product cards in your collection grid. Clicking a swatch swaps the product card image right there on the page, no reload. There’s also a hover preview feature: when a customer hovers over a swatch on a product card, the card image temporarily changes to show that product’s photo. It creates a live preview effect that lets shoppers explore options without opening every product page.
If you want even better performance on collection pages, you can use the app block instead of the default embed injection. App blocks give you more control over exactly where swatches sit within the product card, and they tend to load faster on grid-heavy pages.
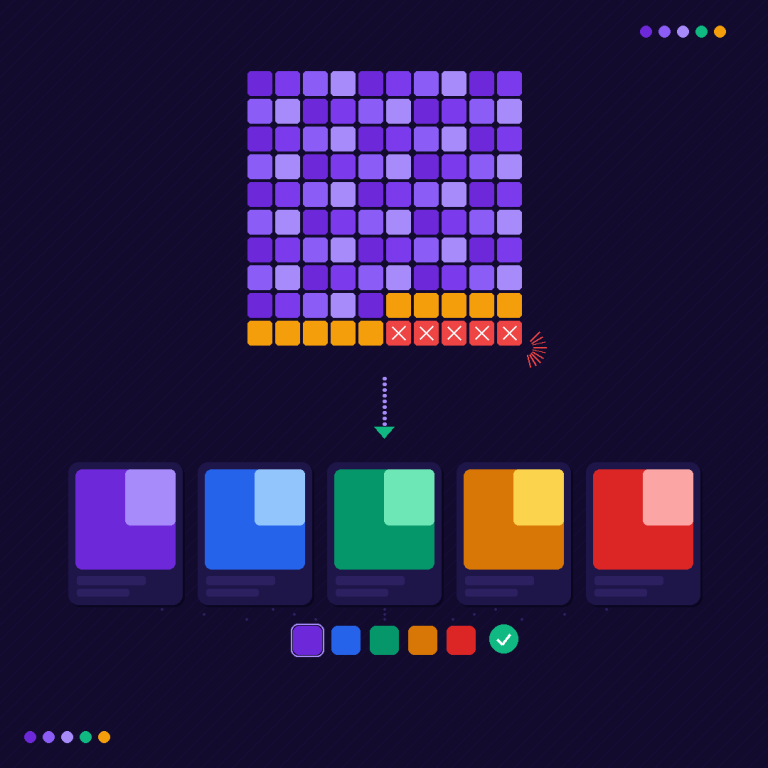
Step 6: Handle Out-of-Stock Products
You have a few options for how unavailable products appear in your swatch rows:
- Hide them entirely so they don’t show up at all
- Push them to the end of the swatch row so available colors come first
- Keep them visible but styled differently with reduced opacity, a diagonal strikethrough line, or both
You can adjust the opacity from 0.1 (barely visible) to 1.0 (normal), and customize the strikethrough line color. For dropdown swatches, out-of-stock products automatically get a “(Sold out)” label appended to their name.
Step 7: Test on Mobile
Don’t skip this. Baymard Institute research found that 57% of mobile sites get swatches wrong. They’re too small to tap, they don’t update the product image, or they overflow on smaller screens.
Rubik has separate visual settings for desktop and mobile, so you can adjust swatch sizes, spacing, and layout independently for each. There’s also a Copy desktop to mobile shortcut if you want to start from the same design and tweak from there.
Grab your actual phone (not just Chrome DevTools) and check:
- Swatches are large enough to tap comfortably (at least 44x44px touch target)
- Tapping a swatch updates the main product image
- The selected swatch has a clear visual indicator (border, checkmark, or similar)
- Swatches don’t push important content below the fold
- On collection pages, swatches don’t break the grid layout
Advanced Setup: Multiple Option Rows and Categories
Two features that most merchants don’t realize they can use:
Multiple groups per product. A single product can belong to more than one product group. If you sell a sofa that comes in different colors and different fabrics, you can create a “Color” group and a separate “Fabric” group. Both swatch rows will appear stacked on the product page. The Display order setting controls which row shows first.
Categories within a group. Inside a single product group, you can organize swatches into subgroups. For example, under a “Color” option, you could create categories like “Warm Tones” and “Cool Tones.” When enabled, the storefront shows category headers above each group of swatches, keeping a long list of colors organized and easy to scan.
What About SEO? Do Combined Listings Help or Hurt?
I get this question a lot, so I’ll break it down.
With standard Shopify variants, all colors share one URL. You get one product page, one title tag, one meta description. When someone searches “navy linen blazer,” your page titled “Linen Blazer” has to compete, and it’s not a strong match.
With combined listings from separate products, each color keeps its own URL, title, and meta description. “Navy Linen Blazer” is its own page on your site. Google can index it on its own, and it can rank for color-specific queries.
The combined listings app connects these pages with swatches, so shoppers get individual SEO-friendly product pages and a smooth browsing experience with visual color selection on a single page.
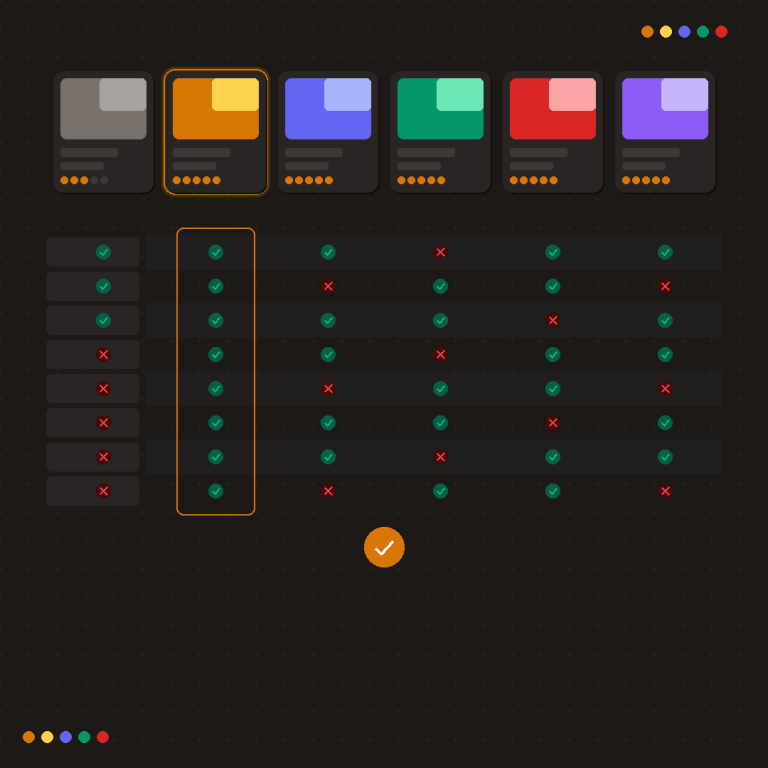
| Factor | Standard Variants | Combined Listings (Separate Products) |
|---|---|---|
| Unique URLs per color | No (query parameters only) | Yes (full product pages) |
| Individual title tags | No | Yes |
| Individual meta descriptions | No | Yes |
| Google Shopping feed | One product, multiple variants | Multiple products, each indexable |
| Internal linking | N/A | Products link to each other through swatches |
| Customer experience | Dropdown or basic swatches | Visual swatches with instant image updates |
If organic traffic matters to your store, the combined listings approach gives you a clear edge for product discovery.
For more on how to structure your Shopify catalog for search engines and AI-powered shopping tools, the Craftshift blog goes deeper into product architecture strategy.
Common Issues and How to Fix Them
“My swatches aren’t showing on the product page”
Two things to check. First, make sure the app embed is activated on your live theme. Open the Rubik dashboard and look at the App embed status badge. If it says Inactive, click Activate. Second, verify that you’ve selected the correct theme type. Since every Shopify theme has a different structure, the app needs to know your theme to inject swatches in the right DOM position. Wrong theme type = swatches in the wrong spot or invisible entirely.
“Swatches appear but clicking them doesn’t change the image”
Check that each product in your group has its own featured image. The app pulls the main product image when someone clicks a swatch. If a product has no image uploaded, there’s nothing to swap in. Also confirm that the image source in your visual settings isn’t set to “Custom image” when you haven’t uploaded any custom images.
“The swatches look different on my collection page vs. product page”
This is expected if you haven’t styled both contexts. Rubik has separate visual settings for product pages and product cards, each with their own desktop and mobile configurations. Check both in the Customize Swatches panel. If your theme’s CSS is also interfering, you can override it using the Custom CSS section with the :host { } syntax that Rubik provides.
“I have 300 products to group. Do I really have to do this one by one?”
No. Use Magic Fill to auto-generate option values and colors from product titles and images. You still need to create the groups and select the products, but the tedious part (typing labels and picking colors for each product) gets handled automatically. For stores with consistent naming patterns like “Product Name – Color,” this cuts setup time from hours to minutes.
FAQ
Install a combined listings app like Rubik Combined Listings that groups separate Shopify products together and displays them as interactive color swatches on a single product page. Each product keeps its own URL while appearing as a swatch option to customers. No coding or Shopify Plus plan is required.
Yes. Shopify’s native Combined Listings app requires Shopify Plus ($2,300+/month), but third-party apps like Rubik Combined Listings work on any Shopify plan, including Basic. You get the same swatch functionality at a fraction of the cost.
Combined listings built from separate products actually improve SEO. Each color or style keeps its own unique URL, title tag, and meta description, which means Google can index each variation individually. Your products can rank for color-specific searches like “red leather wallet” instead of only competing with a generic “leather wallet” page.
Image swatches show a product photo or custom texture thumbnail, ideal for materials and patterns. Color swatches display one or two solid colors (with vertical, horizontal, or diagonal split options). Button swatches are text labels with optional small images inside, good for sizes or model names. Dropdown swatches use a select menu, best when you have many options and limited space.
In Rubik Combined Listings, swatches automatically appear on product cards in collections once you’ve created a product group and activated the app embed. You can control the swatch style for product cards separately from the product page. For better performance and placement control on collection pages, you can also add the product card app block through your theme editor.
Yes. A single product can be part of multiple product groups. For example, the same jacket can appear in both a “Color” group and a “Material” group. Each group renders as its own swatch row on the product page, and the Display order setting controls which appears first. This is useful for products with more than one attribute customers need to choose between.
Rubik Combined Listings works with any Shopify Online Store 2.0 theme, including Dawn, Refresh, and popular third-party themes. The app detects your theme and uses a theme type setting to inject swatches into the correct positions on product pages, collection grids, quick views, and search results. For older themes that haven’t migrated to OS2.0, some manual setup may be needed.
What to Do Next
Showing separate products as color swatches isn’t a hack. For many stores, it’s the smarter product architecture choice. You keep individual product URLs for SEO, you maintain clean inventory tracking per SKU, and your customers get the visual swatch experience they expect.
If you’re on Shopify Plus, the native Combined Listings app handles this. Everyone else can use Rubik Combined Listings on any plan.
See the live demo to try it yourself before installing.