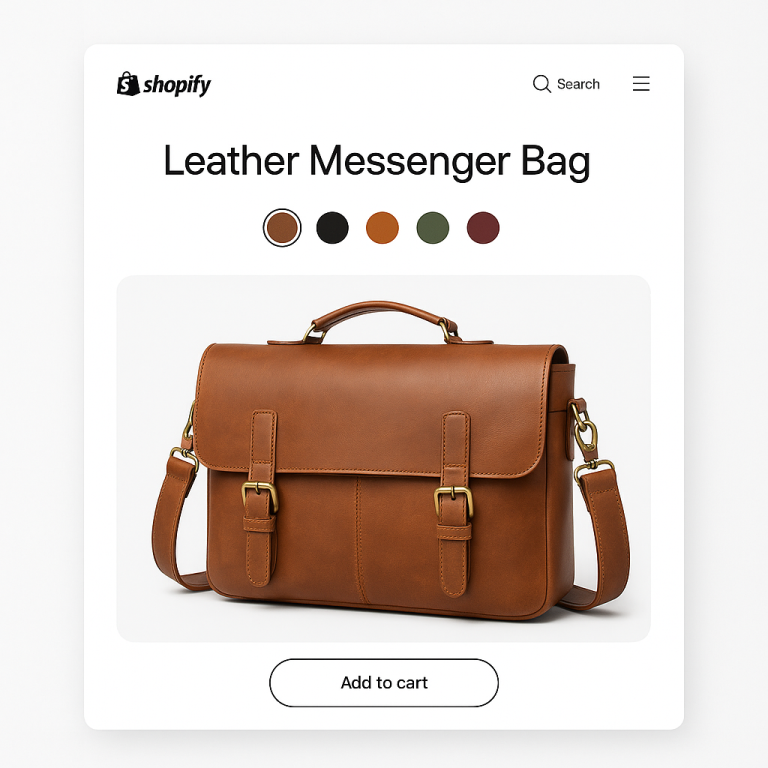
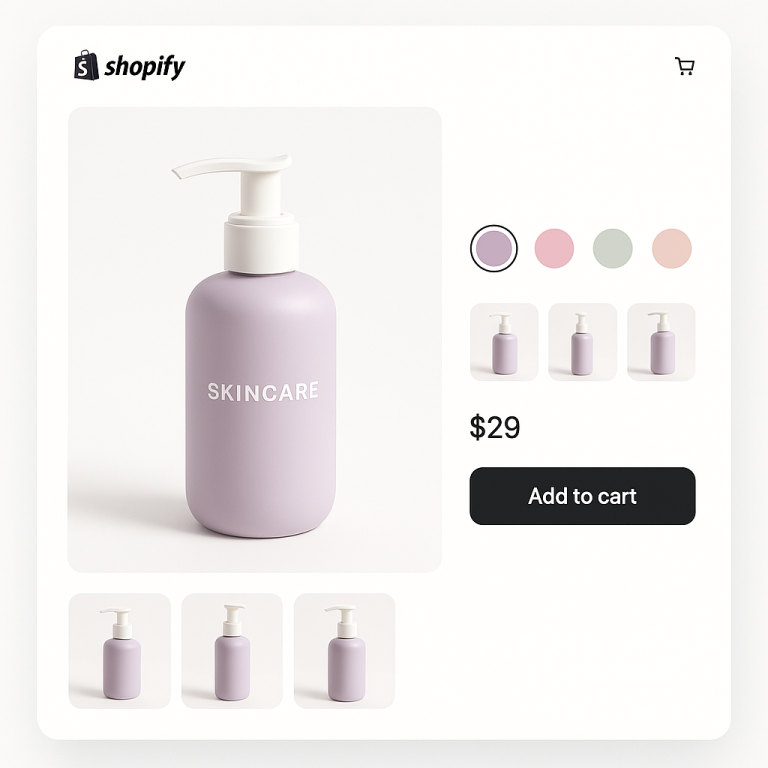
Setting up combined listings on Shopify connects separate products so customers can switch between them with color swatches. A customer on the blue jacket page sees swatches for red, green, and black. They click red. They go to the red jacket page with red product photos. Each product keeps its own URL and SEO.
This guide walks through the full setup using Rubik Combined Listings Swatch, which works on every Shopify plan (Basic, Grow, Advanced, Plus). No Shopify Plus required. Free plan available with 5 product groups.
In this post
- Before you start
- Step 1: Install and activate
- Step 2: Create your first product group
- Step 3: Fill option values (manual or AI)
- Step 4: Set swatch colors and images
- Step 5: Customize swatch appearance
- Step 6: Save and preview
- Bulk setup: create many groups at once
- Showing swatches on collection pages
- Next steps
- Frequently asked questions
- Related reading
Before you start
You need:
- Separate Shopify products that you want to connect. For example, the same t-shirt in 5 different colors, each as its own product listing.
- Product images uploaded. Each product should have at least one image.
- Any Shopify plan. Basic ($39/mo), Grow ($105/mo), Advanced ($399/mo), or Plus. The app works on all of them.
If your products are not yet created as separate listings, do that first. If you are unsure whether to use separate products or variants, read separate products vs variants: the SEO impact.
Step 1: Install and activate
- Go to the Rubik Combined Listings page on the Shopify App Store.
- Click Install. Approve the permissions. The app opens in your Shopify admin.
- On the dashboard, click Activate in the “App embed status” section. This enables the swatch component on your storefront. Without it, swatches will not appear.
- If your theme is not auto-detected, select your theme type from the dropdown. The app supports 350+ Shopify themes including Dawn, Horizon, Prestige, Impulse, Impact, Focal, and 7 page builders (GemPages, PageFly, EComposer, Instant, Beae, Foxify, Replo).
Step 2: Create your first product group
- Click Create new group.
- Enter an internal name for the group (for example, “Cotton T-Shirt Colors”). This is only visible to you in the admin.
- Enter the option name. This is the label customers see above the swatches. Typically “Color”, “Material”, “Style”, or “Size”. Default is “Color.”
- Click Select products and search for the products you want to connect. Pick all the color versions of your product. They appear in a table.
Step 3: Fill option values (manual or AI)
Each product in the group needs an option value. This is the label shown on the swatch: “Blue”, “Red”, “Forest Green”, etc.
You have two choices:
Manual: Type the option value for each product. “Blue” for the blue product, “Red” for the red one.
Magic Fill (AI): Click the Magic Fill button. The AI reads your product titles and images, then auto-fills every option value and picks matching swatch colors. “Mountain Sunrise Tee – Navy Blue” becomes option value “Navy Blue” with swatch color #1B2A4A. One click fills the entire group. No typing, no guessing hex codes.
Magic Fill works best when your product titles include the color name. If they do not, use manual entry or add colors after saving.
Step 4: Set swatch colors and images
Each swatch needs a visual representation. The app supports 7 image sources:
- First product image (default for image swatches)
- Second or last product image
- Custom uploaded image (your own swatch graphic)
- One color (solid circle using primary color)
- Two colors (split swatch with primary + secondary, in 4 directions: vertical, horizontal, diagonal left, diagonal right)
- Auto (tries custom image first, then colors, then product image)
If Magic Fill already picked colors, you are done. If you want to adjust, click the eyedropper icon next to any product. Hover over the product image to pick a color visually, or type a hex code manually.
Step 5: Customize swatch appearance
The sidebar shows a live preview of how your swatches will look. To customize:
- Style presets: Pick from 11 product page presets (square, circle, rounded, polaroid, pills, carousel) and 8 product card presets. Start from a preset and adjust from there.
- Visual editor: Click “Customize swatches” for full control over width, corner radius, spacing, borders, colors, fonts, and more. 70+ CSS variables available.
- AI visual assistant: Click the wand icon and describe what you want: “make swatches round and bigger” or “add a thick blue border.” The AI applies the changes with a live preview.
- Per-group settings: Each group can have its own design. Large image swatches for shoes, small color circles for t-shirts.
- 4 responsive variants: Product page desktop, product page mobile, product card desktop, product card mobile. Each can be styled independently.
Swatches render inside a Shadow DOM, so your theme CSS cannot break them. See the visual settings guide and custom CSS reference for details.
Step 6: Save and preview
Click Save. The sidebar preview updates to show your actual products with the swatch design you chose. Click “View on store” to see it live on your product page and collection page.
That is it. Your first product group is live. Customers can now switch between colors on the product page. The swatches also appear on product cards in your collections.
Bulk setup: create many groups at once
Creating groups one at a time works for a few products. For 50+ groups, use bulk grouping.
Three detection methods:
- Title patterns: Products named “Summer Shorts – Blue” and “Summer Shorts – Red” are auto-detected as one group. Supports dash, pipe, and slash separators, reverse patterns, and fuzzy word matching.
- Product tags: Tag products with
RUBIK::Summer Shorts::Color::Blueformat. - Metafields: Group by shared metafield values (useful if you already track colors in metafields).
Preview detected groups before creating them. Adjust anything that looks off. Then create all groups in one click. A store with 200 products can be fully set up in one session.
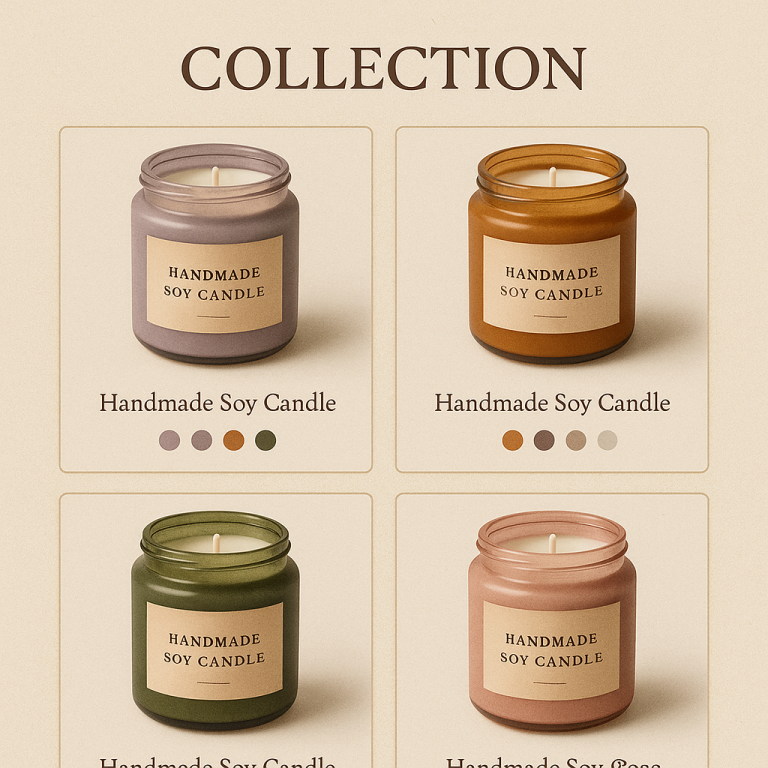
Showing swatches on collection pages
Swatches appear on product cards automatically. In the app settings, make sure “Product card swatches” is turned on. Hovering over a swatch on a product card changes the card image to show that color.
For better performance on collection pages, the app supports app blocks. Go to “Manage app blocks” on the dashboard and add the product card block to your collection template. App blocks load natively through Shopify’s rendering pipeline.
Next steps
- Translations: If you sell in multiple languages, go to “Translate” on any group to add translated option names and values.
- Categories: For groups with many swatches (20+ colors), organize them into categories like “Warm Colors” and “Cool Colors.”
- Out-of-stock settings: In Settings, choose whether to hide sold-out swatches, push them to the end, or show them crossed out.
- Analytics: The app fires a custom JavaScript event on every swatch click. Connect it to Google Analytics or Facebook Pixel.
See the demo store | Watch the tutorial | Full getting started guide
Frequently asked questions
How do I set up combined listings on Shopify?
Install a combined listings app (like Rubik Combined Listings), activate the app embed, create a product group, add your separate products, fill option values (manually or with AI Magic Fill), and save. Swatches appear on product pages and collection pages automatically.
Do I need Shopify Plus?
No. Shopify’s native Combined Listings feature requires Plus ($2,300+/year). Rubik Combined Listings works on every Shopify plan. Free plan includes 5 groups. $10/month for 100 groups. Read more in combined listings without Shopify Plus.
How long does setup take?
About 5 minutes per group with manual setup. Under 1 minute per group with Magic Fill AI. For bulk setup (50+ groups), the entire catalog can be configured in one session using title pattern detection.
Which themes are supported?
350+ Shopify themes including Dawn (ID: 887), Horizon (ID: 2481), Prestige (ID: 855), Impulse (ID: 857), Impact (ID: 1190), Focal (ID: 714), Warehouse (ID: 871), Minimog, Ella, Debutify, plus 7 page builders. Full list at supported themes.
Will this break my collection page filters?
No. Rubik stores grouping data in metaobjects and does not modify your product data. Collection filters continue working normally. This is different from Shopify’s native Combined Listings, which can break color filters. See how combined listings affect collection filters.