To add fabric and material swatches on Shopify, you replace the flat color dot with a small photo of the actual material, so a denim option shows a denim weave, a wool option shows wool, and leather shows grain. A solid circle of color can tell a shopper that something is “tan.” It cannot tell them whether that tan is suede, canvas, or full-grain leather. For furniture, upholstery, and apparel, that difference is the whole sale.
Color is one signal. Texture is another. A grey couch in boucle and a grey couch in flat-weave linen are two completely different products, and a grey hex value flattens both into the same dot. Shoppers buying a sofa or a coat want to feel the surface with their eyes before they ever touch it.
The fix is image swatches: tiny cropped photos of each material used in place of color chips. Below we cover when a texture swatch beats a color swatch, how to shoot and crop the swatch photos, and how Rubik Variant Images assigns a custom image per option value (and lets you mix image and color swatches across different options on the same product).
In this post
- Color swatch vs image swatch: what each one shows
- When texture swatches win
- How to shoot and crop the material photos
- How Rubik Variant Images assigns a custom image per option
- Mixing image and color swatches on one product
- When each material is a separate product
- Frequently asked questions
Color swatch vs image swatch: what each one shows
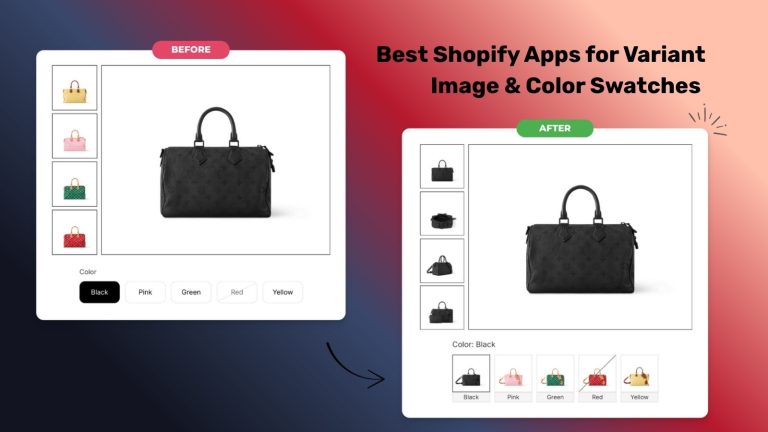
A color swatch is a filled shape that uses a single hex value. An image swatch is a small photo used as the clickable chip. Both sit in the same row of options and both switch the variant when clicked. The difference is what they communicate before the click.
Color swatches are great when the only thing changing is, well, color. A t-shirt in red, navy, and forest green? Three hex values, done. The shopper knows exactly what they’re getting. Nothing about the surface changes, so a photo would just add visual noise.
Image swatches earn their place the second the material itself changes. Picture an armchair offered in velvet, linen, and bouclé, all in the same dusty rose. Three identical pink dots. Useless. The shopper can’t tell the plush option from the nubby one. Swap in three cropped fabric photos and the choice becomes obvious at a glance. This is the same logic we walk through in our deeper look at image swatches vs color swatches, where the texture-versus-tone question gets a full breakdown.
- Color swatch: solid hex fill. Best when only the color changes (apparel basics, painted goods, plain accessories).
- Image swatch: cropped photo. Best when the material, weave, pattern, print, or finish changes.
- Pill button: a labeled text chip. Best for sizes, lengths, or named options where neither color nor texture matters.

When texture swatches win
Texture swatches win whenever the surface carries information the color can’t. Here’s where they pull their weight, and where the flat dot quietly loses you sales.
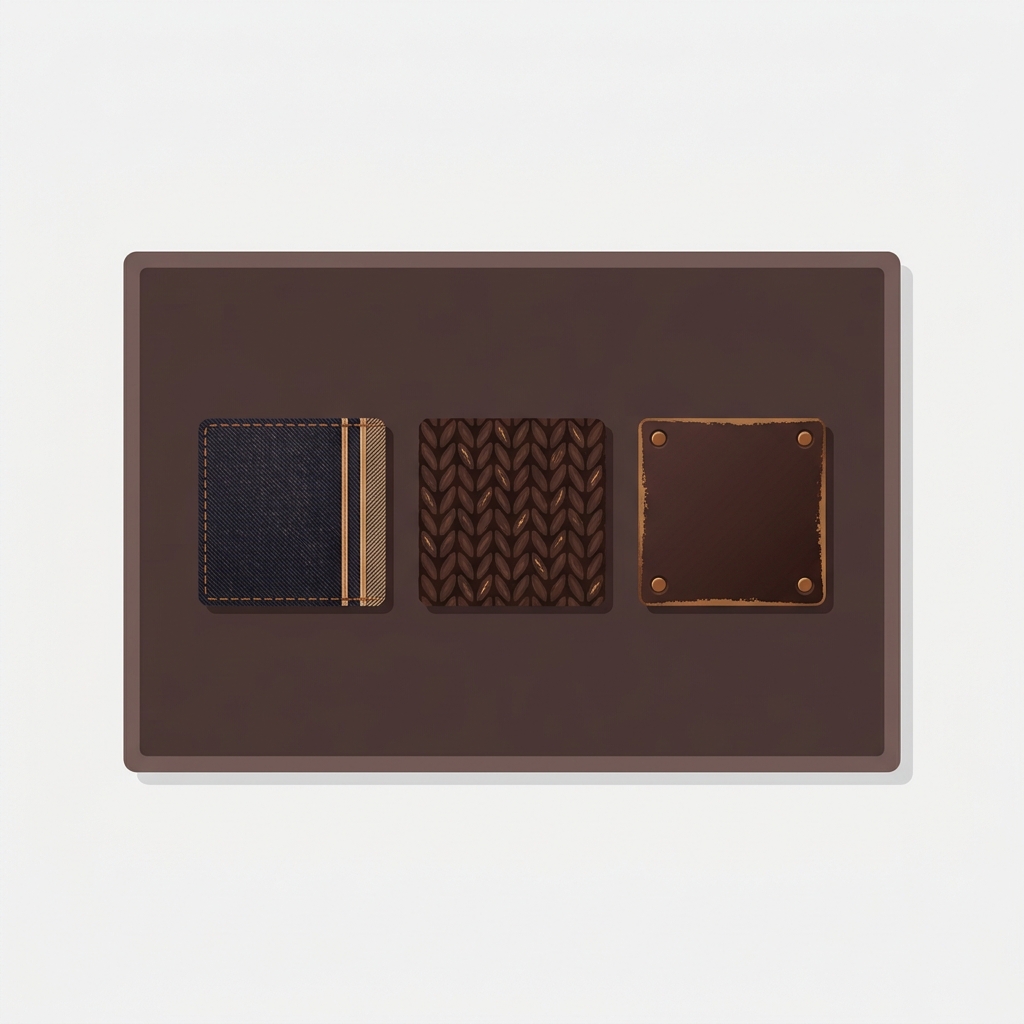
Different materials
Leather, suede, canvas, denim, wool, cotton, recycled polyester. A bag sold in leather and vegan leather looks like one product in two near-identical brown dots, but the materials, price, and feel are worlds apart. Show the grain. Let the shopper see why one costs more.
Patterns and prints
Plaid, herringbone, floral, geometric, camo. A dress sold in three prints can’t be reduced to three dots at all. What color do you even pick for a multicolor floral? A swatch photo of the print is the only honest answer.
Wood and metal finishes
Furniture and lighting live and die on finish. Oak, walnut, ash, matte black, brushed brass, polished chrome. The grain direction and sheen matter enormously to anyone choosing a table or a pendant lamp. A brown circle does none of that work.
And honestly? Why does so much default Shopify swatch advice still treat color as the only axis? The platform’s native swatch picker leans on color and image, but plenty of store setups still ship plain dots for fabric goods. For a sofa in seven upholsteries, that’s a real conversion leak.
How to make fabric and material swatches: shoot and crop the photos
A material swatch is just a small, well-cropped photo of the surface. You don’t need a studio. You need consistency. The swatches sit side by side, so if one is shot in warm light and the next in cold daylight, the row looks broken even when each photo is fine on its own.
- Shoot each fabric flat, filling the frame with the weave. Get close enough that the texture reads, not so close it turns abstract.
- Use the same light source and white balance for every material in a product. Same angle, same distance.
- Crop to a square. Swatches render small, so a square crop keeps every chip the same shape and size in the row.
- Export at a modest resolution. These display tiny. A 300 by 300 image is plenty, and small files keep the page light.
- Name the files so you can tell them apart later (oak.jpg, walnut.jpg, linen-rose.jpg). Future you will be grateful.
One trick worth stealing: shoot the swatch from the same fabric you photographed for the main gallery, so the chip and the hero shot match. Nothing erodes trust faster than a swatch that looks lighter or warmer than the full product photo right next to it. If you want a fuller treatment of chip shape, spacing, and contrast, our friends over at Craftshift wrote a solid Shopify swatch design guide that pairs well with this.
How Rubik Variant Images assigns a custom image per option
Once you’ve got the swatch photos, you need a way to attach one to each option value. Rubik Variant Images does exactly that: pick an option (say Material), and for each value you assign a custom image to use as that swatch. Walnut gets the walnut photo, oak gets the oak photo, and the chips render right in the product page selector.
The app offers three swatch types, mixable across your options: image swatches, color swatches, and pill buttons. For fabric and finish work you’ll lean on image swatches, where each chip is your cropped material photo rather than a hex fill. You set the custom image (or a custom color, if you go the color route) per swatch, so every option value carries the exact visual you want.
We render swatches inside a Shadow DOM, which means the chip styling stays isolated from your theme’s CSS. No theme stylesheet bleeds into the swatches, and the swatch CSS doesn’t fight your theme. That matters more than it sounds: texture chips are fussy about size and spacing, and you don’t want a stray theme rule squashing them into ovals.
And because clicking a swatch also filters the gallery, the right material photos surface the moment a shopper picks that option. Choose “walnut” and the gallery shows the walnut shots, not the oak ones. That swatch-to-gallery link is the same mechanism behind changing product images when clicking swatches, applied to materials instead of colors.
“This app is perfect. it is incredibly easy to set up and use. There are so many cool ways you can set up your variant images AND adjust your swatches. The youtube tutorials are super helpful.”
Anonymous merchant, Rubik Variant Images on the Shopify App Store
Mixing image and color swatches on one product
Here’s where it gets useful. A single product rarely has just one option. A jacket might come in three materials and four colors. You don’t want texture photos for the colors and you don’t want flat dots for the materials. You want both, on the same page, each option styled the way that option deserves.
Because swatch types are mixable per option, you can set Material to image swatches and Color to color swatches at the same time. The material row shows fabric photos. The color row shows clean hex dots. Each option speaks the language that fits it. That’s the whole point of having three types instead of forcing everything into one.
A few combinations that come up a lot:
- Upholstered furniture: Material as image swatches (the fabrics), Color as color swatches (the tones), Size as pill buttons.
- Apparel: Fabric as image swatches (denim, corduroy, linen), Color as color swatches, Size as pill buttons.
- Lighting: Finish as image swatches (brass, chrome, matte black), Bulb type as pill buttons.
If you’ve only ever run two-tone color chips before, the leap to image swatches is smaller than you’d think. The same swatch settings that handle our two color swatches setup also accept a full image, so the muscle memory carries over. And if you want to fine-tune the look, the styling controls behind customizing combined listing swatches follow the same shape, size, and spacing logic.
When each material is a separate product
Sometimes a material isn’t a variant at all. It’s its own product. A sofa in leather and a sofa in linen might have different prices, different stock, and you might want each to rank on its own URL for SEO. In that case the material lives as a standalone product, not an option value.
That’s the job of Rubik Combined Listings. It links those separate material products into one group and shows swatches that switch between them, both on the product page and on collection cards. Each material keeps its own URL and images, which is the SEO play, while shoppers still get a swatch row that behaves like real variants. So if your “fabric swatch” question is really a “these are separate products” question, that’s where you point. You can even have a swatch on one product link to a different product entirely, and surface the same chips on product cards across your collections.
Quick rule of thumb: if the materials share one price and one inventory pool, keep them as variants on one product and use image swatches in RVI. If each material needs its own price, stock, and URL, make them separate products and link them with RCL. Plenty of stores run both apps together for exactly this reason.
Want to see it first? Check the live variant images demo store, watch the tutorial video, or read the getting started guide.
Frequently asked questions
How do I add fabric and material swatches on Shopify?
Shoot a small square photo of each material, then assign that photo as the swatch image for the matching option value. Rubik Variant Images lets you set a custom image per option value, so each fabric or finish renders as its own texture chip in the product page selector instead of a flat color dot.
When should I use an image swatch instead of a color swatch?
Use an image swatch whenever the surface changes, not just the color: different materials, patterns, prints, or wood and metal finishes. A color swatch is fine for plain apparel in different shades, but it can’t show denim versus wool versus leather. When texture carries information, a photo chip does what a hex value can’t.
Can I mix image swatches and color swatches on the same product?
Yes. Swatch types are mixable per option in Rubik Variant Images. You can set the Material option to image swatches (fabric photos), the Color option to color swatches (hex dots), and the Size option to pill buttons, all on one product. Each option uses the swatch style that suits it.
How big should a fabric swatch image be?
Swatches render small, so a square crop around 300 by 300 pixels is plenty. Shoot each material flat, fill the frame with the weave, and use the same light and white balance across every chip in a product. Small files also keep the product page light, which helps load time.
Will material swatches slow down my product page?
No. Rubik Variant Images is metafield-based with no external API calls, so swatch data loads with the page itself. Keep your swatch images modestly sized (a few hundred pixels square) and the texture chips add almost no weight. The render stays isolated in a Shadow DOM so it doesn’t conflict with your theme.
What if each material is a separate product?
If each material needs its own price, stock, or URL, make it a standalone product and link the products with Rubik Combined Listings. It groups separate material products and shows swatches that switch between them on the product page and on collection cards, while each keeps its own URL for SEO.
Do image swatches also change the product images?
Yes. In Rubik Variant Images, clicking a swatch filters the product gallery to show only the media for that option value. So picking the “walnut” material swatch surfaces the walnut photos and hides the rest, which keeps the page focused on exactly what the shopper chose.
Related reading
- How to customize combined listing swatches on Shopify
- How to add two color swatches on Shopify
- Change product images when clicking swatches
- Image swatches vs color swatches on Shopify
- The Shopify swatch design guide
Pull up your most fabric-heavy product, crop one square photo per material, and assign them as image swatches. The flat dots disappear, and so does the “but what does it actually feel like” hesitation.